Scheduling a Report to Export
PharmaClik Rx reports can be scheduled to save to a pre-set location automatically on a one-time or recurring basis. The process is akin to scheduling a report to print automatically.
-
Open PharmaClik Rx Reports.
-
In the Select a Report window, highlight the report that you would like to schedule.
-
Press the Next button. The main tab for the report opens.
-
Enter report criteria, if required.
-
Press the Schedule button. The Report Scheduler Wizard opens.
-
Highlight the desired Report Frequency.
-
Press the Next button.
-
The Report Timing window opens. If required, change the Time:
-
Highlight a day of the week if the report is not scheduled to run daily or one time.
-
Enter the First Date that the report will be generated.
-
The Last Date is optional. When a Last Date is specified, the report will be inactivated after the last generation on that date.
-
-
Press the Next button.
-
If the report requires a report period, the Report Period window opens. Make selections from the dropdown lists to choose a report period. Press the Next button.
-
The Report Name and Report Output window opens. If desired, update the Report Name.
-
Choose where the report will be saved:
-
Select To a file in the Report Output section.
-
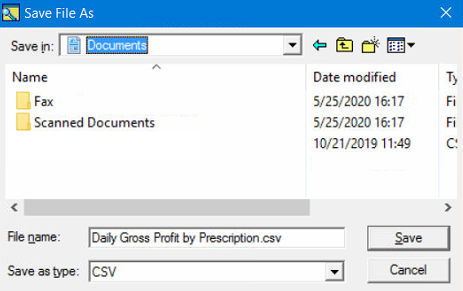
Select the Save As button. The Save File As window opens.
-
Select a file location in which to save the report.
Tip: You can save a report to a cloud drive by navigating to the cloud drive on your computer (learn how to find the cloud drive).
-
Select the file type from Save as type (CSV with Headers is recommended).
-
Select Save. The screen returns to the Report Name and Report Output window.
-
Select Include date in file name if you don’t want the report to be overwritten with each generation.
-
-
Some reports provide the ability to set custom Sort and Filter options - enter these options if required.
-
Press the Next button.
-
Review the information in the Report Confirmation window.
Note: If you want to make changes, press the Previous button to return to previous windows and make changes.
How do I find my cloud drive in the Save File As window?
Depending on your cloud storage system, the cloud may be accessible from different locations on your computer. Some systems are accessible via a desktop app (e.g. DropBox, Google Drive), while others may be built-in (e.g. OneDrive in the C: drive > Users folder). Choose the location that applies to your cloud storage system.